Monday, October 03, 2016

Denim and Crochet


Hello! I haven't crocheted much lately....but I'm (slowly) working on some crochet for gifting. Aside from that, I got busy with another craft I love - recycled denim projects...I love working with cotton denim fabrics. Having to make projects as a custom order is a bonus!
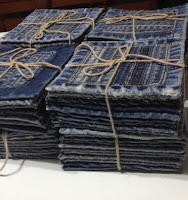
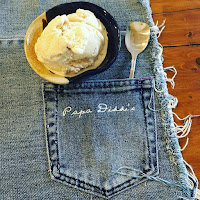
I made placemats for an ice cream shop/restaurant, using denims that I've sourced from a used-clothing store. I choose good-quality denim pants and skirts, wash and dry them soon as I buy them. For a while my living and dining area became my production area :p ...

recycled denim


And here are some of my finished products (placemat photos in the restaurant were snatched on Instagram)

denim placemat
 denim coaster denim placemat denim and crochet

Now I'm thinking of combining crochet and denim crafts again...like what I did a few years ago. Hoping I'll have tutorials made for some projects like these:

Denim and crochet
denim and crochet


Thursday, June 02, 2016

My design in Interweave Crochet Summer 2016!!!

Hello, pardon my excitement...I have a design in the latest issue of Interweave Crochet! Yay! Go see it, go get a copy now!...Take a look at the lovely patterns of the Summer issue here on Ravelry, or here on the Interweave site.

And here's my very own top-down construction pullover, cap-sleeve top, made using size 10 cotton thread. Here is a photo of my design featured on the contents page! [photo credit: Interweave/Harper Point Photography]

Limpet Lace Top
If you are thinking of making this...here are some notes I can share.
I don't know if there will be other minor issues, but I see that my finished size, and gauge numbers had been edited a bit. I think the difference lies in the kind of hook used and not blocking the fabric before measuring. The stitch pattern is stretchy and the finished top is meant to be worn with 2-4" negative ease.
Because of the nature of the design, the yoke is the same for the first three sizes, and the same but bigger (with two more pineapples), for the last two sizes as written in the pattern.
The yoke is very pretty! Working on it is both enjoyable and challenging because every round is different. (I really found it hard to take breaks while making this, it is so engaging.)

Here's my original pattern notes and gauge swatch:

Finished Size: 30 ½  (32 ½ , 34 ½ , 37, 39 ½ )” to fit bust sizes up to 32 (34, 36, 39, 42)”; Finished length 25”. Sample made in size 32 ½ .

Yarn: Coats and Clark Aunt Lydia’s crochet thread Classic 10 (100% Mercerized cotton; 350 yd [320 m]; # [antique white], 4 (4, 5, 6, 7) balls.
Hook: size B (2.2mm). Adjust hook size if necessary to obtain correct gauge.
Notions: Stitch markers (m); yarn needle.
Gauge: 34 sts and 15 rows = 4” in main pattern stitch

Notes
Construction starts with a bruges lace neck band, onto the lace yoke worked continuously in joined rounds, then separated into front and back at the chest, then worked in joined rnds from the underarm. Main body shaping and length can be custom-fit, up to bottom lace section. Bottom lace pattern repeats every 30 sts.
Ch 3 at the beg of each rnd/row, counts as dc, ch 4 at the beg of rnd counts as tr.


Stitch Guide
dc2tog: Double crochet 2 together—[Yarn over, insert hook in next st and draw up a loop, yo and draw through 2 lps] twice, yo and draw through 3 lps on hook.
dc3tog: Double crochet 3 together—[Yarn over, insert hook in next st and draw up a loop, yo and draw through 2 lps] 3x, yo and draw through 4 lps on hook.

Gauge Swatch
Row 1: (RS) Ch 42, dc in 4th ch from hook and on each ch across, turn. (40 dc)
Row 2: Ch 3, working in front loops only, dc in each dc across, turn.
Rows 3 to 16: Rep row 2. 
Fasten off, block and measure.


Additional Notes:

The lace yoke part is about 5 inches from neck edge to the beginning of the solid stitch part.
Here's my test project for the bigger-size range (the last two sizes in the pattern). The yoke is 2 pineapple patterns more than the yoke for the first three sizes in the pattern.


The yoke is quite stretchy too...and the last two sizes in the pattern will be quite huge compared to the sample project in the magazine, which is the second size in the pattern. The dressform here is a size 34" bust, and the project comes to approx. 37" at the bust (unstretched).

Crochet test project, lace yoke


By the way, here's the first sample I made, shown here as my design proposal submitted to Interweave. Its closest to the first size in the pattern. Worn here with 1 1/2" negative ease.

Lace yoke top
Lace-yoke Top


Please let me know if you have a question or comment about this design. I'll be adding notes here as needed for clarification.


Tuesday, May 31, 2016

Open-weave Rattan stitch Poncho - free crochet pattern


A knit-look is achieved with the use of a bigger hook than is usually used for thread, and from the unique combination of stitches. This poncho looks good on, and fits a wide range of bust sizes and body shapes. Pattern can also be easily modified to a different size. 
It is best to make a gauge swatch first, before making a wearable.
(View this pattern on Ravelry)

Open-weave Rattan Stitch Poncho
by Mimi Alelis
http://mycrochetstuff.blogspot.com/2016/05/open-weave-rattan-stitch-poncho-free.html

Materials
Cotton thread size 8, Monaco or Cannon , 5-6 balls
4mm crochet hook
Stitches used
ch - chain
sc - single crochet
dc - double crochet 
esc - extended single crochet: insert hook in next stitch (or space), yarn over and pull up a loop, yarn over and draw through one loop to make a ch, yarn over and pull through two loops on hook to complete the stitch.
Gauge Swatch (4 1/4" square) (diagram here)
Row 1: Ch 22 (increase or decrease in multiples of 4), esc in 2nd ch from hook and in each ch across, turn. (21 esc)
Row 2: Ch 2 (does not count as st), dc in the same st, ch 2, skip one esc, sc in next, (ch 3, skip one esc, sc in next) repeat across, end with ch 2, dc on the last st, turn. (10 ch-spaces)
Row 3: Ch 1, 2 esc in each ch-space across, esc on last st, turn. (21 esc)
Row 4: Ch 4, sc in the next st, (ch 3, skip one esc, sc in next) repeat across, end with ch 2, dc on the last st, turn. (11 ch-spaces)
Row 5: Ch 1, esc in same ch-space, 2 esc in each ch-space across, turn. (21 esc)
Rows 6-17: Repeat rows 2 - 5. Fasten off.


Poncho Pattern
Main Body, make 2 (each rectangular piece measures approx. 35 x 17 inches)
Row 1: Ch 154 (loosely), (inc or dec in multiples of 4), esc in 2nd ch from hook and in each ch across, turn. (153 esc)
Row 2: Ch 2 (does not count as st), dc in the same st, ch 2, skip one esc, sc in next, (ch 3, skip one esc, sc in next) repeat across except on last 2 sts, ch 2, dc on the last st, turn. (76 ch-sps)
Row 3: Ch 1, 2 esc in each ch-space across, esc on last st, turn. (153 esc)
Row 4: Ch 4, sc in the next st, (ch 3, skip one esc, sc in next) repeat across, end with ch 2, dc on the last st, turn. ( 77 ch-sps)
Row 5: Ch 1, esc in same ch-space, 2 esc in each ch-space across, turn. (153 esc)
Rows 6-65: Repeat rows 2 - 5. 
Fasten off, leaving a long tail for sewing.
Assembly
Lay out the 2 pieces in a V-formation as follows.
1. Lay one piece diagonally on the left, with the foundation edge on the outer left side, and one corner pointing downwards to the center.
2. Lay the other piece diagonally on the right (to overlap the left piece), with the foundation edge on the outer right side and one corner pointing to the center. (see pic below)
3. Fold the top left short edge to the corresponding edge of the right piece, to an approximate length of 17" 
4. Sew using the same thread, applying an invisible seam (see tutorial on vogueknitting) .
5. Flip the back side to the front, while maintaining the V-formation, and repeat steps 3-4.
Neck Edging
Rnd 1: Attach thread at the neck edge, ch 1, sc in every stitch, join with sl st in the 1st sc.
Rnds 2-3: Ch 1, sc in back loop only of each sc around, join.
Fasten off and weave in ends.


Open-weave Rattan Stitch Poncho
poncho assembly
Assembly step 1 & 2


(more photos on Ravelry)


Tuesday, May 24, 2016

Crochet cotton projects

I have always loved working with cotton! Among cotton threads and yarns available to me, I have my favorites.

Schachenmayr Catania is a sportweight 100% cotton yarn which I first used for purses...then I realized it's usefulness for baby accessories since it is thicker than thread, but softer. So I searched patterns and tried some that worked, like this cute baby girl booties. I made these for my 3-month-old niece and for my coming soon grandbaby girl!

Crochet Baby Booties

I have modified the closure...so that instead of sewing a button, I crocheted one using cotton thread (size 8). I also crocheted flower petals around the buttonhole. Here's how I did it:
Crocheted button: with cotton thread and 2mm hook, ch 3, 4 tr-cluster in the 1st ch, fasten off leaving a 10-inch tail, sew the cluster into a ball, then sew it securely on the bootie. 
Crocheted flower petals: attach thread near the buttonhole, make 10 slip stitches around the hole, join on the 1st slip stitch (ch 3, 2dc-cluster on the same st, skip one slip stitch, slip stitch on the next stitch) 5 times, fasten off and weave in ends.

Next is another cotton baby project, this time its worsted weight, and 85% cotton. Premier Yarns Home Cotton became my favorite worsted weight for accessories and amigurumis because it is softer and easier to work with.
Crochet Baby Shoes

For this baby shoes, I used a pattern I bought several years ago. One thing I learned in choosing patterns for babies, it's so hard to choose!...most of it look so cute in photos but not all of it actually fits right or is practical to use for babies. Most of it don't have modeled pics...so you will only know it works once you've tried it on a baby. 
I think I will be making more baby items for the babies in my family and extended family...I get so inspired when I see delighted recipients of my handmade gifts :)

Next is my new wearable design using cotton thread, size 8. The brand I use is either Monaco or Cannon. Size 8 cotton thread is what's readily available in my area and I also find it to be the best option for our prevailing warm weather. 


Here'a a poncho I made...one that is light and stylish as well. It is a very slow, monotonous project...but I like the resulting fabric so much. 
I have written down the pattern and will post here soon.
Two more cotton thread projects I recently made can be viewed here.

And last but not least among my favorite cottons is cotton thread size 10. I prefer this when making my own original design, since it can easily be substituted with popular brands around the world. It is just a bit thinner than size 8 cotton, and so many patterns can work for both size 8 and size 10 thread.

Crochet sample project
Add caption

Here's a peek of me working on my design submission several months back. I used Aunt Lydia's size 10 cotton thread. 

Tuesday, April 26, 2016

Open-weave Rattan Stitch pattern - free crochet pattern

Here's a crochet stitch pattern I made up and called open-weave rattan stitch. It came up when I wanted to crochet a mesh shawl different from the ordinary loopy one I previously made (tropical shawl). Still using our local cotton thread size 8, I wanted the fabric to be stretchy. To achieve this, I used a bigger hook than usual. The pattern is quite simple, though the use of esc stitch (extended single crochet) makes it unique. Its a 4-row repeat pattern...it looked to me like the rattan weave I've seen on furnitures (pic here), except that the holes are not lined up straight, but diagonal.

The first shawl project I made using this stitch pattern is shown here. It starts at the long edge of the shawl and ends at the tip.

For now, here's the pattern for the swatch I made.
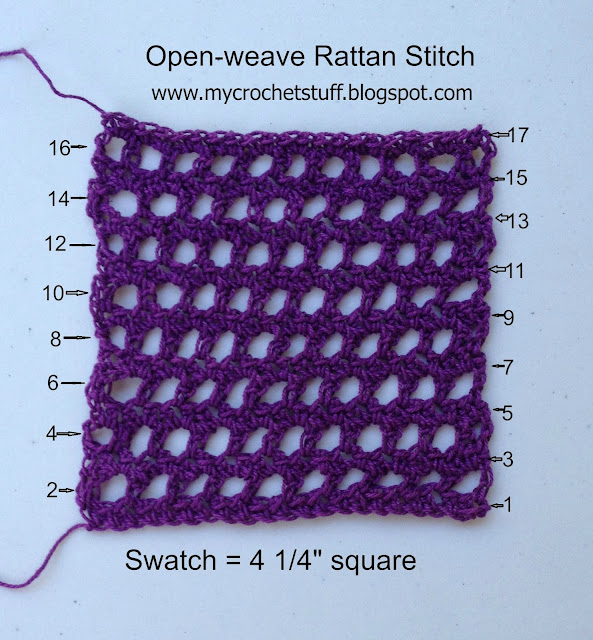
Crochet rattan stitch
Open-weave rattan stitch crochet pattern

Materials:
Cannon cotton thread, size 8, (100% cotton thread)
Crochet hook size 4mm
Gauge swatch measures 4 1/4" square

Stitches used
ch - chain
sc - single crochet
dc - double crochet 
esc - extended single crochet: insert hook in next stitch (or space), yarn over and pull up a loop, yarn over and draw through one loop to make a ch, yarn over and pull through two loops on hook to complete the stitch.

Pattern
Row 1: Ch 22 (increase or decrease in multiples of 4), esc (extended single crochet) in 2nd ch from hook and in each ch across, turn. (21 esc)
Row 2: Ch 2 (does not count as st), dc in the same st, ch 2, skip one esc, sc in next, (ch 3, skip one esc, sc in next) repeat across, end with ch 2, dc on the last st, turn. (10 ch-spaces)
Row 3: Ch 1, 2 esc in each ch-space across, esc on last st, turn. (21 esc)
Row 4: Ch 4, sc in the next st, (ch 3, skip one esc, sc in next) repeat across, end with ch 2, dc on the last st, turn. (11 ch-spaces)
Row 5: Ch 1, esc in same ch-space, 2 esc in each ch-space across, turn. (21 esc)
Rows 6-17: Repeat rows 2 - 5. Fasten off.


Poncho project using the open-weave rattan stitch - pattern here.
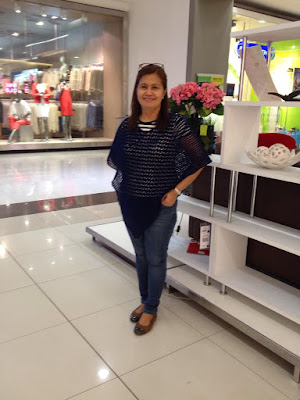
crochet poncho
mycrochetstuff


Monday, February 29, 2016

Hello Blog!

Hello dear viewers, hello blog! I have not been posting here for sometime... nowadays I tend to browse and post more on Instagram and less on Ravelry or Facebook, and much less here on Blogger... :( But I still have plans for this blog and I hope you come back often to see my projects and patterns and updates, 
Meanwhile, if you'd like to see, here's my Instagram account. If you're wondering why Instagram...for me, its much simpler and easier to post there, and quicker to see and appreciate what others are doing. I read this article http://www.jennstrends.com/10-reasons-why-you-should-be-on-instagram/ and I totally agree.
Here are some throwback pics I made into a collage to post on Instagram (thanks to Ravelry members who shared their projects)...some of the projects from my designs on Interweave Crochet magazine:

Lauren Sweater
Hibiscus Tunic

And here's my current WIP :
Crochet Poncho
Crochet WIP
I will be finishing this crochet poncho soon, and will post a pattern. This is just a simple stitch pattern, but it is kind of unique ;)

Thursday, January 21, 2016

Bargain books and all books with free shipping!

As a satisfied customer myself I would certainly recommend this online bookstore to everyone. I recently found a couple of books I like with almost 50% discount, and ordered it ;) You may click on the following photos to go to the store.

These crochet books and so much more are available with free shipping worldwide!


Wednesday, January 06, 2016

2015 crochet stuff

Hello, welcome to my blog, and happy new year!
Just a note before I go to the 2015 crochet stuff.... The past few years up to early 2015, I didn't have much time and inspiration for my crocheting projects and designs. Then the past several months somehow I found inspiration. I browsed my books and the internet...I believe I still have something new to offer :) I would like to think that I'll continue to be inspired this year. I recently finished two wearable designs, the pattern will be available this 2016...so I can't show it yet in this post. Meanwhile, here's what I came up with in 2015.

Patterns
These are all free patterns for quick, simple and useful projects :) (see all my patterns on Ravelry)


1. Handy Oval Makeup Purse
2. Circular Scarf
3. Handy Coin Purse
4. Strapped Flipflops

Projects
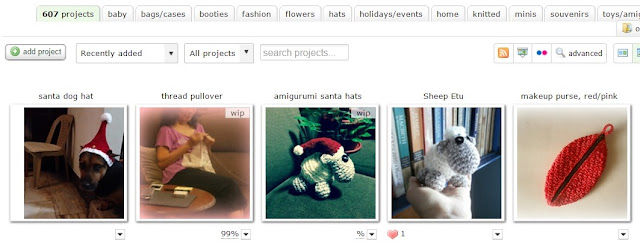
Started the year at 582 and ended with 607 projects - an additional 25 projects in 2015. (details of my projects on Ravelry)
crochet projects 1
crochet projects 2
crochet projects 3

Yarns
I tried not to add much to my stash - since I didn't use up much anyway. But fellow yarn lovers know how it goes... ;)
My  2015 purchases were mostly ordered online at Knitwerks and Crafts Boutique from a fellow crafter friend who sell yarns sourced from different countries.
My latest purchase from her is Nazli Gelin Garden thread, size 10 from Turkey, and Anchor size 5 thread from India.


Other purchases from Knitwerks this year are the following. I have reordered Premier Home cotton yarns and Aunt Lydia's threads, since I like it so much! (photo is from a previous order). 


Also I purchased from Gantsilyo Guru with a store in Pasig City, not so far where I live...but I prefer the convenience of buying online. I will experiment with these when I find time.


Other Stuff
I occasionally buy a crochet book or magazine to add to my library. Since I discovered how easy it is to buy from The Book Depository I often check it out.
I bought this book, but have yet to make a project from it.


I recently joined Instagram, and so far here are my best pics:
Hope you can follow me at https://www.instagram.com/mimicat18/

Thanks for looking! And by the way, there's this blog, Around the World in 80 Skeins, with posts featuring knit and crochet designers from around the world. I am in there too ;)

You can also find me here on:
Facebook
Twitter
Instagram

Thank you!