Showing posts with label baby crochet. Show all posts

Sunday, April 30, 2023

Crochet your summer 'must-haves'

Those of us who can crochet, need not buy some of the staples for cool summer oufits. You only need to buy yarns or threads and sometimes you need to buy a crochet pattern.

Following are some of my suggestions from my own crochet designs. These have been around for several years, but I believe they won't go out of style.

Sea Star Cardi 

My latest design for a beach cover-up or a summer cardigan is published in crochet.com as Sea Star Cardi. You may visit their website to download the pattern for free.

Pattern and project details are here on Ravelry.


Le Tote

A yarny tote, that can carry your beach essentials, or your current project if you like to take it along with you anywhere. Another downloadable free pattern from crochet.com.  View the pattern and project details on Ravelry, and get inspired to make your own. I love my sample in blue. It is a practical everyday bag, soft and huggable too.


Hibiscus Tunic


A beach coverup I designed several years ago. If you love crocheting with thread, this will be quite doable for you. The pattern is available for sale at Interweave.com The price varies, and sometimes it is greatly discounted.

View this design on Ravelry.


Sienna Top


This is the Sienna Top from the book "It Girl Crochet". I used size 10 thread for my own top. I added a thin cotton fabric for lining. 

The pattern for this top is available for sale on interweave.com. It can also be found in the book and magazine where its published.


Thanks for looking, happy crocheting! 


Wednesday, February 08, 2017

Minnie Mouse Hat - free crochet pattern

free crochet pattern
Minnie Mouse Hat

Minnie Mouse Hat (see project on Ravelry)
by Mimi Alelis
http://mycrochetstuff.blogspot.com/2017/02/minnie-mouse-hat-free-crochet-pattern.html

This is a beanie hat constructed from top to bottom, with increasing rounds done in dc, and the repeat rounds done in hdc. Rounds are joined with a slip stitch, and the beginning ch 1 or ch 2 of each round is not counted as a stitch. (The joining is hardly noticeable this way.)

Materials: Worsted weight yarn, 1 skein black and half-skein red. I used Premier Home Cotton yarn (85% cotton, 15 polyester), 128 meters/80gms
Aluminum Crochet Hook size: 5 mm. (use 4.5mm for smaller hat)

Gauge: Using 5 mm. hook, 15 hdc across = 4"; 10 hdc rows = 4"
Size: 1-3 yr old
Measurements: Length, 6 1/2"; Circumference, 19"

CROWN:
Note: Ch 1 or ch 2 at the beg of rnd does not count as a st.
Rnd 1: With black yarn, start with a magic ring, ch 1, work 12 hdc into ring, sl st in 1st hdc to join -- 12 hdc.
Rnd 2: Ch 22 dc in each hdc around, sl st in 1st dc to join -- 24 dc.
Rnd 3: Ch 2, (1 dc in next dc, 2 dc in next dc) rep around, sl st in 1st dc -- 36 dc.
Rnd 4: Ch 2, (1 dc in each of next 2 dc, 2 dc in next dc) rep around, join -- 48 dc.
Rnd 5: Ch 2, (1 dc in each of next 3 dc, 2 dc in next dc) rep around, join -- 60 dc.
Rnd 6: Ch 2, (1 dc in each of next 4 dc, 2 dc in next dc) rep around, join -- 72 dc.
Rnds 7-11: Ch 1, hdc in each hdc, join -- 72 hdc. Fasten off black, attach red yarn.
Rnds 12-16Ch 1, hdc in each hdc -- 72 hdc. Fasten off at the end of last rnd.

Ears (make 4)
Rnd 1: With black yarn, magic ring, ch 1, work 10 sc into ring, sl st in 1st sc to join -- 10 sc. 
Rnd 2: Ch 1, 2 hdc in each sc, join -- 20 hdc.
Rnd 3: Ch 1, (1 hdc in next hdc, 2 hdc in next hdc) rep around, sl st in 1st hdc -- 30 hdc.
Rnd 4: Ch 1, (1 hdc in next 2 hdc, 2 hdc in next hdc) 8 times, sc in the last 6 hdc -- 32 hdc, 6 sc.
Fasten off, leaving a 12" tail for sewing.
Finishing: Join 2 pcs together as follows: with wrong sides facing, sl st both pieces on each hdc st, leave the sc sts open.

Bow
Make bow from fabric as shown in sample project (search youtube for fabric bow tutorial), or crochet one ....

Hat Assembly
Sew ears matching the sc sts, to the side of hat at rnds 4-7, sew back and front of ear with a little gap in-between, so that the ears will remain standing.
Sew bow in the middle of hat, facing front.
Make 6 white dots from felt cloth, using a button to trace the circles. Attach with glue. (I used hot-melt glue gun.)


Monday, February 06, 2017

Hello Kitty Hat - free crochet pattern

Hello Kitty Hat Crochet
Hello Kitty Hat


Hello Kitty Hat
by Mimi Alelis
http://mycrochetstuff.blogspot.com/2017/02/hello-kitty-hat-free-crochet-pattern.html

This is a beanie hat constructed from top to bottom, with increasing rounds done in dc, and the repeat rounds done in hdc. Rounds are joined with a slip stitch, and the beginning ch 1 or ch 2 of each round is not counted as a stitch. (The joining is hardly noticeable this way.)

Materials: Worsted weight yarn, white, 1 skein; pink, half-skein; and small amounts of black and yellow. I used Premier Home Cotton yarn (85% cotton, 15 polyester), 128 meters/80gms
Aluminum Crochet Hook size: 4.5 mm (use 5mm hook for a bigger size)

Gauge: Using 4.5 mm. hook, 4 hdc across = 1"; 3 hdc rows = 1"
Size: 1 to 2 yr-old
Finished Measurements: Length, 6 1/4"; Circumference, 18"
Stitches used: ch- chain, sl st - slip stitch, sc - single crochet, hdc - half-double crochet, dc - double crochet

CROWN:
Note: Ch 1 or ch 2 at the beg of rnd does not count as a st. 
Rnd 1: With white yarn, start with a magic ring, ch 1, work 12 hdc into ring, sl st in 1st hdc to join -- 12 hdc.
Rnd 2: Ch 22 dc in each hdc around, sl st in 1st dc to join -- 24 dc.
Rnd 3: Ch 2, (1 dc in next dc, 2 dc in next dc) rep around, sl st in 1st dc -- 36 dc.
Rnd 4: Ch 2, (1 dc in each of next 2 dc, 2 dc in next dc) rep around, join -- 48 dc.
Rnd 5: Ch 2, (1 dc in each of next 3 dc, 2 dc in next dc) rep around, join -- 60 dc.
Rnd 6: Ch 2, (1 dc in each of next 4 dc, 2 dc in next dc) rep around, join -- 72 dc.
Rnd 7: Ch 1, hdc in each dc, join -- 72 hdc.
Rnds 8-15: Ch 1, hdc in each hdc, join -- 72 hdc. Fasten off white, attach pink yarn.
Rnds 16-17Ch 1, hdc in each hdc -- 72 hdc. Fasten off at the end of last rnd.

Ears (make 2)
Rnd 1: With white yarn, magic ring, ch 1, work 5 sc into ring, sl st in 1st sc to join -- 5 sc. 
Rnd 2: Ch 1, hdc in same st (1 hdc in next sc, 2 hdc in next sc) twice, join -- 7 hdc.
Rnd 3: Ch 1, (2 hdc in next hdc) rep around, sl st in 1st hdc -- 14 hdc.
Rnd 4: Ch 1, (1 hdc in next hdc, 2 hdc in next hdc) 7 times, join -- 21 hdc.
Rnd 5: Ch 1, hdc in each hdc, join -- 21 hdc.
Fasten off, leaving a 12" tail for sewing.

Bow
With pink yarn, leave a 6" tail at the beginning, make 24 chs, sl st in 1st ch to form a circle (inc or dec chs to customize length of bow).
Rnd 1: Ch 1, sc in each ch, sl st in 1st sc to join -- 24 sc.
Rnd 2: Ch 1, (sc in 4 sc, hdc in next 4 sc, sc in 4 sc) twice, sl st to join -- 24 sts.
Rnd 3Ch 1, (sc in 4 sc, hdc in next 4 hdc, sc in 4 sc) twice, sl st to join -- 24 sts.
Rnd 4: Ch 1, sc in each st around, join -- 24 sc. Fasten off leaving a 12" tail for sewing.
Finishing: With the tail ends at the middle of bow, wrap and tie both ends tight, several times.

Eyes (make 2)
With black yarn, magic ring, ch 1, (2 sc, 1 hdc, 2 sc, 1 hdc) in ring, sl st on 1st sc to join, fasten off leaving 8" tail for sewing. Finishing: (optional) with white yarn, embroider dot on eyes.

Nose
With yellow yarn, repeat pattern for eyes.

Assembly
Sew ears at the side, along rnds 4-7. Sew bow just below one ear. Sew eyes on rnds 11-12. Sew nose on rnds 13-14. For the whiskers, use a black marker or embroider with black yarn, placing each whisker 3/4" away from the side of the eyes.


Modeled Hello Kitty Hat
Hello Kitty Hat


Tuesday, May 24, 2016

Crochet cotton projects

I have always loved working with cotton! Among cotton threads and yarns available to me, I have my favorites.

Schachenmayr Catania is a sportweight 100% cotton yarn which I first used for purses...then I realized it's usefulness for baby accessories since it is thicker than thread, but softer. So I searched patterns and tried some that worked, like this cute baby girl booties. I made these for my 3-month-old niece and for my coming soon grandbaby girl!

Crochet Baby Booties

I have modified the closure...so that instead of sewing a button, I crocheted one using cotton thread (size 8). I also crocheted flower petals around the buttonhole. Here's how I did it:
Crocheted button: with cotton thread and 2mm hook, ch 3, 4 tr-cluster in the 1st ch, fasten off leaving a 10-inch tail, sew the cluster into a ball, then sew it securely on the bootie. 
Crocheted flower petals: attach thread near the buttonhole, make 10 slip stitches around the hole, join on the 1st slip stitch (ch 3, 2dc-cluster on the same st, skip one slip stitch, slip stitch on the next stitch) 5 times, fasten off and weave in ends.

Next is another cotton baby project, this time its worsted weight, and 85% cotton. Premier Yarns Home Cotton became my favorite worsted weight for accessories and amigurumis because it is softer and easier to work with.
Crochet Baby Shoes

For this baby shoes, I used a pattern I bought several years ago. One thing I learned in choosing patterns for babies, it's so hard to choose!...most of it look so cute in photos but not all of it actually fits right or is practical to use for babies. Most of it don't have modeled pics...so you will only know it works once you've tried it on a baby. 
I think I will be making more baby items for the babies in my family and extended family...I get so inspired when I see delighted recipients of my handmade gifts :)

Next is my new wearable design using cotton thread, size 8. The brand I use is either Monaco or Cannon. Size 8 cotton thread is what's readily available in my area and I also find it to be the best option for our prevailing warm weather. 


Here'a a poncho I made...one that is light and stylish as well. It is a very slow, monotonous project...but I like the resulting fabric so much. 
I have written down the pattern and will post here soon.
Two more cotton thread projects I recently made can be viewed here.

And last but not least among my favorite cottons is cotton thread size 10. I prefer this when making my own original design, since it can easily be substituted with popular brands around the world. It is just a bit thinner than size 8 cotton, and so many patterns can work for both size 8 and size 10 thread.

Crochet sample project
Add caption

Here's a peek of me working on my design submission several months back. I used Aunt Lydia's size 10 cotton thread. 

Wednesday, May 21, 2014

Painting and crafting...


For about a month, this table was outside waiting to be painted, and I haven't crafted anything for a while. It was too warm and I wasn't inspired to work on this or start a project :p
Then a few days ago, I resolved to stop procrastinating. I went ahead and painted this table like mad! I didn't really do a good job of sanding and painting and even accidentally spilled some paint...but finally its done and I have my project table back :)

My Project Table
Now this crafting corner needs a makeover...

Meanwhile, since I haven't been crafting recently...I would like to share my last favorite project.
Last March while my sister, my brother in-law, and my nephew were here on vacation, I got inspired to make something for my nephew. I was also then eager to work on recycled denim projects...and since there wasn't much time to make a crocheted item, I decided to do a denim book with crocheted appliques (project details on Ravelry).
Now that I don't see my nephew in person, I'm so glad to view pictures and videos of him taken by my Sis. This one she took when her son was trying to put his current favorite book in the pocket of his denim book. So cute!


Thursday, April 03, 2014

Crochet - finished or not

I still have some patterns and projects to finish...which already has taken too long. Sorry to keep some of you waiting. I really plan on sharing more free patterns this year - so far its still in-the-making. I promise to do this, soon...
I only managed to do little projects, little home improvements and the usual chores. And here's some of the little projects I made:
First, here's an illustration I recently made for my pattern Teeny, Tiny Heart. Since I don't have a program (or rather don't know how to use one), I drew the chart by hand and improved it with some photo editing on picmonkey ;)

crochet tiny heart
Teeny, Tiny Heart

Last January when the weather was a bit cold, I got inspired to make baby booties from the Red Heart Super Saver yarns that I bought last December. Here's my baby nephew wearing his sneaker booties.
He wanted to play with it ;)

crochet booties
crochet sneaker booties


Then I have another nephew, about 18 months old. He, his Mom (my sister) and his Dad (my Dutch BIL) live in the U.K..They came to visit last month, He's so adorable! I love how he mimics the dogs' barking and he's fond of all kinds of animals, including bear stuff toys :) Here's a recent photo of him enjoying a lovely spring day, back in their place.


And this is the project that I made for him - a recycled denim baby book. Its made up of 4 flaps or 8 pages in all. I crocheted the letters, numbers and bear appliques. The heart applique was made from the above Teeny, tiny heart pattern :)


Lastly, here's another cell phone purse I made following my pattern Chic Cell Phone Purses. I modified the bottom and used a slightly bigger hook, and made a shoulder strap. I'm not sure I'll use this though, the strap is not long enough  for crossbody.


More of my crochet projects next post ;)


Tuesday, May 03, 2011

Crochet Mini Booties Souvenir - free pattern


Mini Booties Souvenir 
by Mimi Alelis, copyright 2011

Materials
You will need only a few yards of thread for each bootie. I used Cannon cotton thread, size 8
Crochet hook: 2mm or 3/0
Safety pin or marker
Yarn needle for sewing and weaving in ends
Optional: Magnet, or keychain attachment
Finished measurement: 1 1/4 inches in length at the sole.
(Gauge doesn't matter much for this pattern)
Special Stitches:
hdc/dc together - yo, insert hook into st, pull up loop, leave the 3 loops on hook, yo, insert hook into next st, pull up loop, yo, and pull through 2 loops, yo, and pull through remaining 4 loops on hook
dc/hdc together - yo, insert hook into st, pull up loop, yo, and pull through 2 loops, leave the 2 loops on hook, yo, insert hook into next st, pull up loop,  yo, and pull through all 4 loops on hook

Bootie
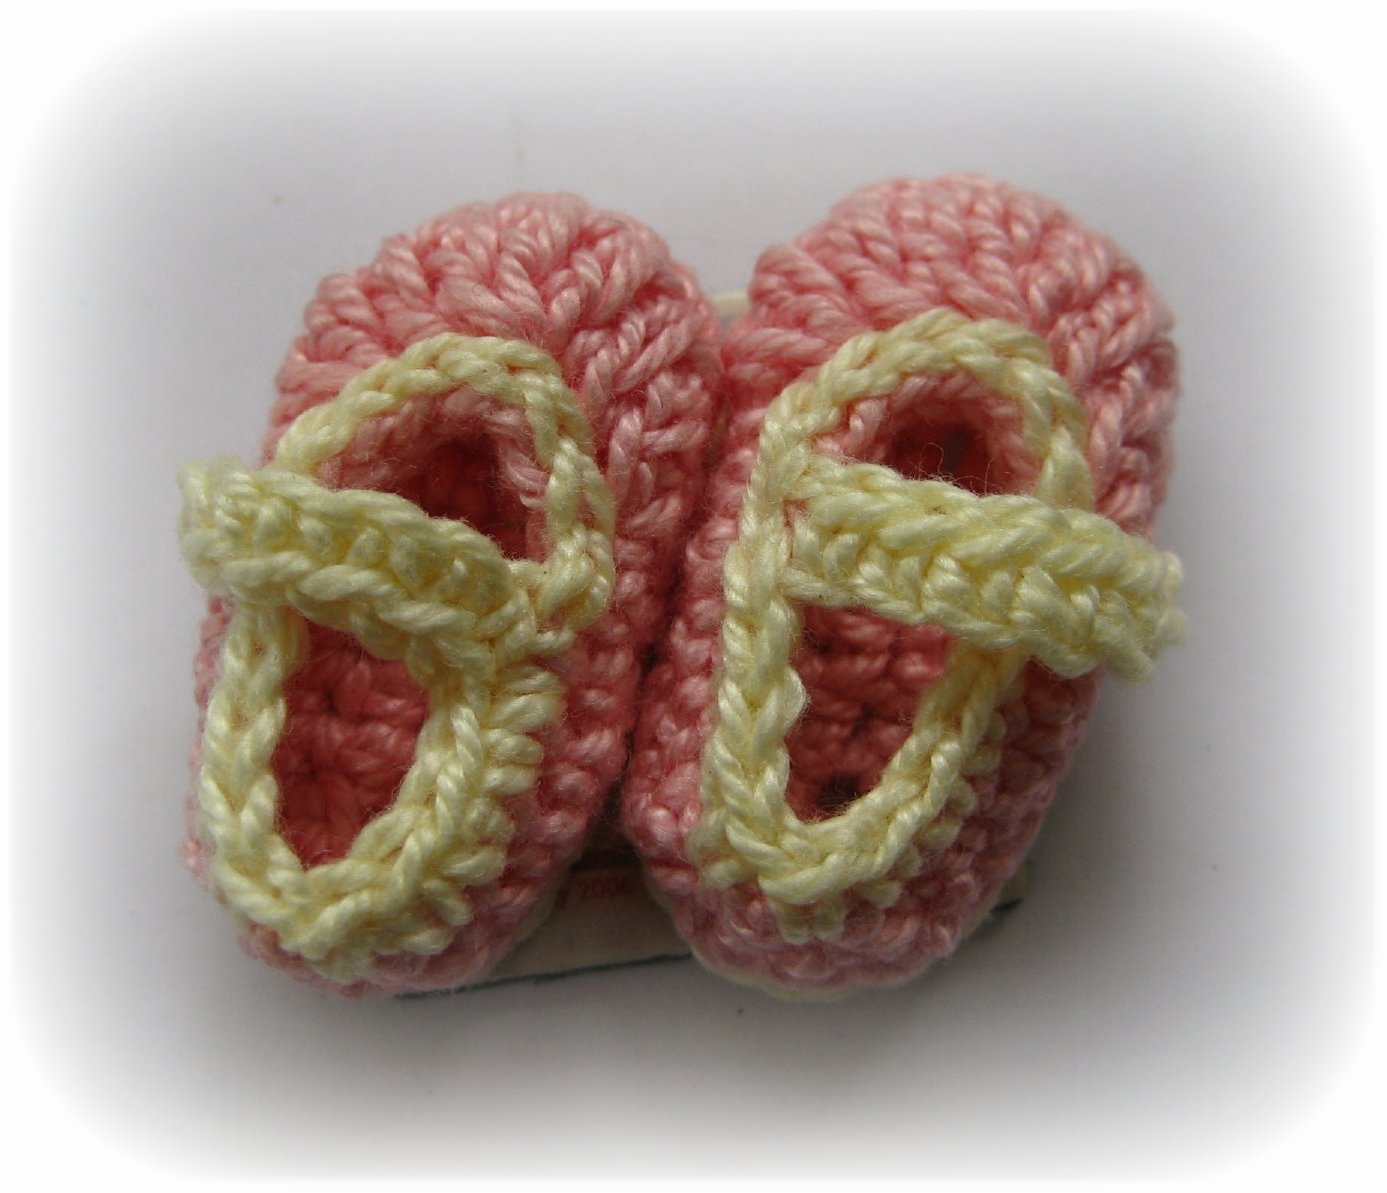
Rnd 1: With pink thread and 2mm hook, ch 7, sc in 2nd ch from hook and on each of 4 ch across, 4 sc in last ch, turn to opposite edge of starting ch, sc in next 4 sts, 3 sc in last st, sl st on the 1st sc to join. (16 sc)
Rnd 2: Ch 1, sc in 4 sc, hdc in next sc, 2 hdc in next, 3 dc in next, 2 dc in next, 2 hdc in next, hdc in next, sc in next 4 sc, 2 sc in each of next 2 sc, join. (23 sc)
Rnd 3: Ch 1, sc in the back loop only of each sc around, join (23 sc)
Rnd 4: Ch 1, sc in 5 sc, hdc/dc together (see explanation above) on the next 2 sc (mark this st if making the right bootie), dc in next sc, 3-dc together on the next 3 sc, dc in next sc, dc/hdc together on the next 2 sc (mark this st if making the left bootie), sc in next 5 sc, (sc together the next 2 sc) twice, join (17 sts)
Leave 10 inches tail, fasten off pink thread.
Strap and edging 
Right bootie
Working with yellow thread, insert hook at left side of bootie in 2nd sc from st marked, pull up loop, ch 7, sc in 2nd ch from hook and on each ch across, sl st on same st as the beginning; sl st in each of the next 7 sts at the front part of bootie, sc in the remaining sts of rnd 4, sl st on the same st as the beginning, sl st on next st. Leave 18 inches tail, fasten off pale yellow thread.
Left bootie
Working with yellow thread, insert hook at right side of bootie in 2nd sc from st marked, pull up loop, ch 7, sc in 2nd ch from hook and on each ch across, sl st on same st as the beginning; sc in each of the next 9 sts at the back part of bootie, sl st in the remaining sts at the front part, sl st on the same st as the beginning, sl st on next st. Leave 18 inches tail, fasten off pale yellow thread.
Bottom edging
Weave in yellow thread to the back and bottom of bootie. With top of bootie facing you, pull up thread on remaining loop from rnd 3, sl st in each loop around, weave in end.
Assembly and finishing
Weave in pink thread to where the strap should close, sew the strap in place, then weave the thread to the back and bottom of bootie. For a fridgie, cut off remaining thread, glue the bootie onto a magnet (sample used is one-inch square). For a keychain attachment, make a chain (ch 10) with the remaining thread, weave the end back into the chain, then attach the keychain ring.
Step-by-step photos are here on Ravelry.

Wednesday, April 27, 2011

Baby Crochet

Meet my 2nd grandniece, born last March

So cute!
I haven't actually met her though, and would seldom see her since she lives outside of our city :p But when I saw her pictures I really wish I could make something for her...
I did volunteer to make the christening souvenirs, though it was a bit late. I didn't have time to experiment with other designs, so I just played safe and picked a Japanese pattern for a mini bootie. I modified it a bit, and minimized weaving of ends, (which takes up a lot of time since I needed to make 60 pieces of booties!). I planned to make 30 pairs, but fell short by 4 pairs.

Maybe I can share written instructions for these, later.

Btw, I got the free printable gift bag template here. I reduced the size, to print 2 gift bags per sheet. And the souvenir item fits perfectly in it too :)

And here are some of the baby crochet designs that I made a while back. It isn't much, so I hope I can add to it. Also its very warm here, and most booties, hats and mittens might not be of much use.

Wednesday, February 17, 2010

Crocheting in Summer

It is mostly summer weather here in the Philippines. The cool months of December and January seemed to have passed so quickly, and its not even as cold as it used to be :(

Now in the middle of February, it is already getting so warm in the middle of the day and by March to April it is expected to be very hot!
I don't think I would be able to concentrate so much on crocheting, so I'll probably save the simple projects for this time. I plan to make a new set of glass cozies for our ice-cold drinks, small bazaar items for gifting and for selling (so I can buy halo-halo everyday!) and maybe finally be able to make my own designed beach ensemble, so I can offer it in time for U.S. summer season.
Meanwhile, here are my recent projects:
*This is my latest WIP. I was working on another shawl, but it was so simple and monotonous, I got tired of it. So when I saw Lily's design, I just had to try it. It was a bit challenging at first, but really easy once you get past the first pattern repeat. I'm almost finished on my 2nd ball of thread. Here was my WIP after finishing the 1st ball:


* A recent FO I posted before, is this belated birthday gift - baby hat I made for my grandniece who turned one last Jan.12.
(these were shots from my mobile phone, Jan.31)


Below pic, is my lovely niece and her baby.
This is the other baby hat I made a while back, which she already outgrew.


* For my cousin's (soon-to-be born) baby boy, I made this hat. (Its almost the same as above, with minor modifications)


And, here's the belated matching gift - I wasn't able to finish it in time for the baby shower. I'd just have to make sure my cousin gets this soon, since this is quite small and maybe will fit her baby only up to two months.


I bought the pattern for this, and you can see the details on my Ravelry project page.

Saturday, January 23, 2010

Crochet Update, January 2010

Crochet for charity
Help for Haiti patterns are still up for sale on Ravelry.
About 10 Ravelers purchased patterns from me from Jan.16-24, and because of this I was able to make a small donation to Hope for Haiti.


It is heartbreaking to see in the news what has happened due to the earthquake. Let's continue to pray for them, and pray for ourselves too - to ask for protection from earthquakes and other calamities.

Crochet for yarn
Once in a while, I need to feed my curiosity for yarn. For those who don't understand a crocheter or knitter's need for a variety of yarns, I could liken it to a chef's need to have different kinds and the best of ingredients that could be had. I also love to cook and occasionally seek out a variety of ingredients. I'm only limited by budget, of course. As with yarn, I have to restrain myself :p
I saw Deneen's yarns for destashing here. I'm sure treating myself to a new skein of yarn won't hurt anyone. I picked a skein of cotton-hemp yarn, and I'll be patiently waiting for it in the mail ;)

Crochet for gift


My only crochet project as of this past week is this baby hat. This will fit my one-year-old grandniece. Can't wait to see her wearing it ;)

Sunday, March 16, 2008

WIPs and yarny stuff

Haven't been doing much crocheting as I planned to... So after a while of not posting, I only have these to share:

First of all, I finally got the goodie box that my sister sent me all the way from London! In it were all the crochet-related wishes that she granted me, plus some vanity products and yummy treats. (Thanks again, Sis!)

A while back she sent me some yarns called Lustre, which I used to make some keychain purses. I like the softness and sheen of the yarn, so I requested some more of the purple color, which I plan to make a shawl or shrug. Again, she surprised me with more yarns :)


Then I got very interested in the Hilos La Espiga nylon cord, which was used by designer Mary Jane Hall for her keychain purse design. So I tried to buy some online, and was able to order it from Mona of CrochetStyleETC, based in Ohio. I asked her to mail it to my sister in UK. She was very nice and accommodating, and the products she offers are wonderful and her prices are so good. I ordered two rolls of size 18 nylon.


She also sent me some snippets of the other sizes of nylon cord. I'm sure I'm going to order again from her, though its so hard to choose what to order...there are so many things I want from her shop to make various projects.


Meanwhile, I'm working on another of my cropped cardigan design. This will be for my sister if she likes it ;)


Lastly, here's a Baby Newsboy Cap I made. This is sized for about 16" head circumference. I'm working on other sizes so I could offer the pattern for sale.

Thursday, March 06, 2008

Crochet Booties

These days, if I'm not making shrugs I'm making baby booties! I started out with this white and yellow pair, using a pattern that I adapted from an old magazine. With the same pattern I made the following two pairs. And instead of using satin ribbons, I crocheted ties.


Both were made from size 8 cotton threads, using 1.5mm hook. Estimated size is for 0-3 mos. baby.
I made the ties with a crocheted "bead" or flower at the ends so that it won't slip out.

Friday, February 15, 2008

Friday FO and my Pay-it-Forward

Its Friday again, and its when we meet for our crochet livelihood project. Unfortunately, I was there but the group wasn't...there was some miscommunication.
Anyway, I wanted to see if they finished the shrugs and also the baby hat, of which I have given them the patterns last week.
Now I have another pattern to share with them. Here is the FO.


Materials: Cannon cotton thread, size 8
1.5mm steel hook

The design is adapted from a pattern in an old magazine.

I've just uploaded this project on Ravelry. And here's an FYI for Ravelry users - if you want to use your photos from other hosts other than Flickr, you may now be able to, after paying a toll of $3. I went ahead and paid, since I figured it isn't much, and I've been using Ravelry a lot. I have photos in my googlepages, and I don't want to put all my project photos in my Flickr account.

Now for my Pay-it-Forward rules:
I will send a gift to 3 people who leave a comment here requesting to join this PIF exchange.

I don’t know what that gift will be yet and you may not receive it tomorrow or next week, but you will receive it within this year, that is my promise!

The only thing you have to do in return is pay it forward by making the same promise on your blog.
Want to participate?
* Leave a comment on this post
* make the same promise on your own blog.

Friday, December 14, 2007

Photo Gallery

Recently, I have collected a few more photos of projects made from my patterns. I have taken the liberty of adding these to my photo gallery :)


Michele and Melanie's lip balm holders


Jennifer's twisted wrap


Kimberly's poinsettia coasters


Pewee's flower applique


And...oh so cute baby pics!


Flower frame by Manuela


Helmet hat by Riohnna

Friday, November 16, 2007

Photo Gallery

Lately, I have seen some more projects made from my designs. Thanks to all the wonderful photos shared online, and to those sent to me by email. Here are the most recent ones:
Gene and Hope's beret cap with brim:


Deneen's
diagonal-striped pouch, matrix purse, and stylish sack bag.


Riohnna, Pearlin and Tina's mesh bags.


Riohnna's baby mittens and poinsettia doily!


And, the baby hats! These are from Tina (on the bear), Ashley (on the baby), Cathy (with blue flower) and mine is the one with the ribbon :)


I have yet to add some of these pics to my photo gallery.