Showing posts with label crochet souvenir. Show all posts

Sunday, February 12, 2017

Hearts Flower - free crochet pattern


Just in time for Valentines, I saw a fabric flower with heart-shaped petals, and got inspired to make a crochet version. So here is the simple crochet design that I came up with as a Valentine treat for my fellow crocheters. Most any yarn and corresponding hook can be used for this pattern.

Hearts Flower
by Mimi Alelis copyright 2017
Note: This pattern is for personal use only, not for distribution and not to be posted on any other site. 
Original link: http://mycrochetstuff.blogspot.com/2017/02/hearts-flower-free-crochet-pattern.html

Materials:
Worsted weight yarn, I used Premier Cotton yarn
Crochet Hook size 4mm
Finished size: 2.5 inches in diameter

Flower
Rnd 1: Start with magic ring, ch 1, 5 sc in  ring, join with sl st to first sc. 
Rnd 2: (Ch 1, sc in sc, turn, ch 2, 4 dc in sc, turn, ch 2, dc2tog, ch 1, sl st in next dc, ch 2, dc2tog, ch 1 sl st on top of turning ch 2 of previous row, 2 sl st at the side of dc row, sl st at the base of petal, sl st on the next sc) rep 5 times, making 5 petals. Fasten off, leaving 6" tail for sewing, if making this as an embellishment.
Center (optional - you may instead sew a button in the center of the flower)
With contrasting color yarn, make a magic ring, ch 2, 4-dc cluster in ring, fasten off leaving a 6" tail for sewing. Pull both ends tight, knot together, sew in center of flower. Weave in loose ends.


Wednesday, September 17, 2014

Random Crochet Stuff

Catching up post on some recent crochet stuff...

Here's a little teddy souvenir item I made for my nephew's 1st birthday last July. It is made from a Ravelry designer's pattern (details here)
I made up the number 1 figure and the scarf. This is only 2 inches tall ;)

Tiny Teddy
Little Teddy Souvenir

Some simple bracelets made to use up leftover yarns and materials. The first one using coins with holes...the pattern is free and can be found on my FB page.


The next one is just a simple ch and sl st bangle - using a garter cord...project details on Ravelry


Since halloween is near...and if you're looking for a simple halloween accessory, there's a free pattern I made a few years ago - Just Got Stitched-up Choker, pattern here. I'll be making a few more of these to sell on my Etsy shop https://www.etsy.com/shop/mimicrochet


Lastly, I've just picked up my order from Bergere de France yesterday, though the package was marked received at the P.O. on Aug 26 (12 days after they shipped it), I only got the Postal notice this week...and as if they purposely delayed it - since the Postal/Customs fee is now P100., which is a 100% increase effective this week :p. Hello Postmaster General :/

Bergere order
Bergere de France

The yarn is Bigarelle - very nice!! I love the natural texture of cotton and linen combined...and it has a fresh outdoor scent ;) The items are reasonably priced...though the shipping for this cost me around $25., flat rate for international shipping....so I should have ordered more yarns :p Then again it was so hard to choose which yarns I would actually end up making a project. These two skeins are enough to knit the top on the cover of the magazine. Hope to be able to make it!


Wednesday, July 30, 2014

Throwback free crochet patterns

These are the free patterns that I previously published in my other blog titled My Patterns...(haha, don't know what I was thinking back in 2005, but it was the in thing to have blogs, so I got several :p)

crochet free pattern
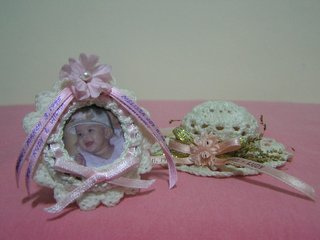
flower frame souvenir

 
Flower Frame Souvenir
Designed by: Mimi Alelis @2002
http://mycrochetstuff.blogspot.com
Note: Pattern and photos are original, all rights reserved by designer.
Materials:
10 gms. cotton or rayon crochet thread, in ecru or other color
1.75mm. steel hook
small length 1/8 " satin ribbon
small flowers for decoration
white glue
Instructions
Frame
Rnd 1: Ch 5, 14 dc in 4th ch from hook (Ch 3 counts as 1st st). Join with sl st on top of ch 3 (15 sts).
Rnd 2: Ch 4, * dc on next dc, ch 1. rep. from * around. Join on ch 3.
Rnd 3: Ch 3, *2 dc in ch-1 space, dc on dc. rep. from * around. Join. (45 sts)
Rnd 4: Ch 1, sc in back loops only on every dc. Join.
Rnd 5: Ch 3, * skip one sc, hdc on next sc, ch 1. rep. from * around. Join on ch 2 of starting ch. fasten off.
Edging: With front facing, join thread on remaining loop of rnd 4. * Ch 3, 2 dc on same st, skip 2 sts, sl st on next st. rep. from * around.
Join (15 shells) Fasten off.
Stand
Row 1: Ch 7, sc in 2nd ch from hook and in each sc across. (6 sc) turn
Row 2: Ch 1, sc in each sc across (6 sc). turn
Row 3: Ch 1, sc in each 2 sc, 1 sc over the next 2 sc (dec), sc in next 2 sc.(5 sc). turn
Row 4 - 5: Ch 1, sc in each sc across. turn.
Row 6: Ch 1, sc in 1st sc, sc over the next 2 sc (dec), sc in each of next 2 sc. (4sc) turn
Row 7 - 8: Ch 1, sc in each sc across. turn.
Row 9: Ch 1, sc in 1st sc, sc over the next 2 sc (dec), sc in last sc (3 sc). turn.
Row 10: Ch 1, sc in each sc across. Fasten off leaving an 8" length for sewing.
Finishing
Sew the stand at the back of frame. Stiffen the frame with white glue mixed with equal amount of water. Do not put stiffener on round 5 of frame. Leave to dry and shape as necessary. Dry completely. Weave a 1/8" ribbon on round 5.
Tie to a bow and trim ends. Decorate with flowers.


crochet free pattern
hat souvenir
Hat SouvenirDesigned and copyrighted by: Mimi Alelis @2002
http://mycrochetstuff.blogspot.com
Note: Pattern and photos are original, all rights reserved by designer.

Materials:
10 gms. cotton or rayon crochet thread, in ecru or other color
1.75mm. steel hook
small length 1/8 " satin ribbon
small flowers for decoration
white glue
Instructions
Starting at the top, ch 4
Rnd 1: 14 dc in 4th ch from hook, sl st on starting ch.
Rnd 2: ch 4, *dc in next dc, ch 1; rep. from * around, ending w/ ch 1, sl st in 3rd st of ch 4 (15 sps)
Rnd 3: ch 3, * 2 dc in next sp, dc in next dc, rep. from * around, ending with 2 dc in last sp. sl st on top st of ch 3. (45 dc)
Rnd 4: ch 1, sc in same space. * ch 3, skip 2 sc, sc in next sc; rep. from * around. join
Rnd 5: sl st in ch 3 sp. ch 1, * sc in same space, 3 dc in next sc, sc in next space, ch 3; rep. from * around. join.
Rnd 6: sl st to 2nd dc. ch 1, sc in same space, * ch 3, sc on ch 3 loop, ch 3 sc on 2nd dc; rep. from * around. join.
Rnd 7: ch 1, sc in same space *2 sc in ch 3 space, sc on sc, rep. from * around. join.
Rnd 8: ch 3, *skip 1 sc, hdc on next sc, ch 1; rep. from * around. join on ch 2 of starting ch.
Rnd 9: ch 1, sc in same space. ch 5, skip 1 sp and 1 hdc, sc on next sp, * ch 5, skip 2 hdc, sc on next sp; rep. from * around. join.
Rnd 10: ch 1, sc in same loop, * sc on next loop, 5 dc on next sc, sc on next loop, ch 5; rep. from * around ending with sc on last loop, ch 5, join.
Rnd 11: Sl st to the 3rd dc, ch 1, sc on same space, * ch 7, sc on next loop, ch 7, sc on 3rd dc of next shell; rep. from *around. ch 3, tr on starting sc.
Rnd 12: ch 1, sc in same space. * ch 7, sc on next loop, 5 dc in next sc, sc on next loop, rep. from * around ending with ch 7, sc in next loop. join.
Fasten off. Weave in ends with needle.
Finishing Stiffen wtih white glue mixed with equal amount of water. Shape and mold as necessary. Dry completely. Weave a 1/8" ribbon about 15" long on round 8. Tie to a bow and trim ends. decorate with flowers.


crochet free pattern
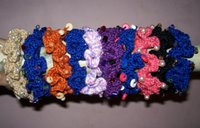
beaded scrunchie

Beaded Scrunchie
Designed and copyrighted by: Mimi Alelis @2005
http://mycrochetstuff.blogspot.com
Note: Pattern and photos are original, all rights reserved by designer.

Materials:
1 ball crochet cotton (Cannon crochet cotton used in sample)
22 beads of your choice
Size 6/0 crochet hook (3.50mm)
Ponytail elastic
Yarn needle for finishing
Instructions:
Work with two strands of thread held together.
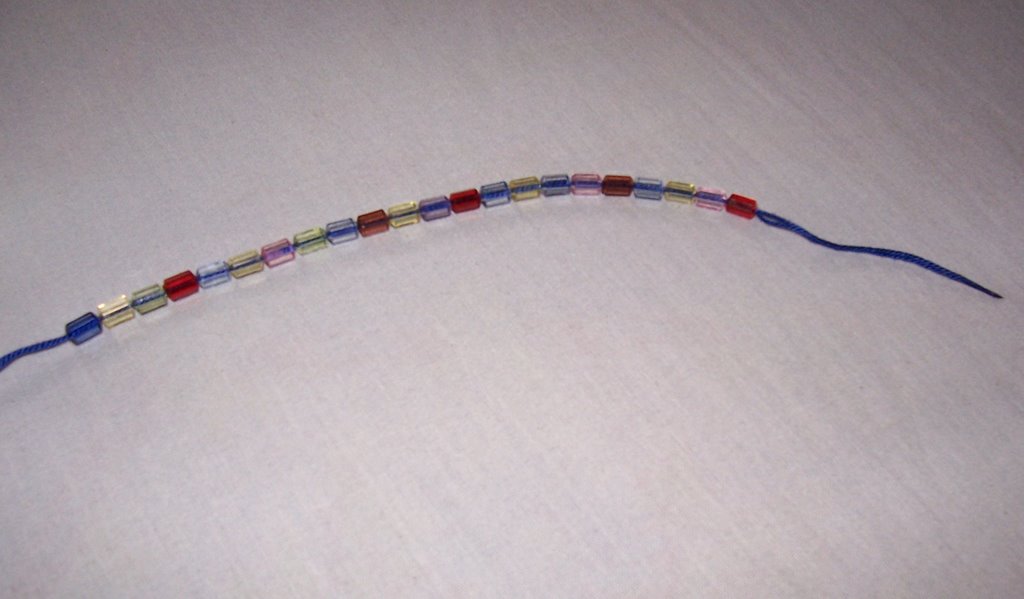
First string the beads onto the thread before starting to crochet. (I use white glue to stiffen the end of the threads to easily string the beads.
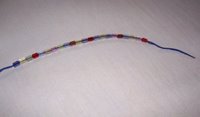


Knot the thread on the elastic
Rnd 1: Single crochet around elastic (44 sc). Sl st on 1st sc to join.
Rnd 2: Ch 4, (dc in next sc, ch 1) repeat around. Sl st on 3rd ch of beg. ch 4
Rnd 3: Sl st in 1st ch 1 space. (2dc, ch1, 2dc,ch 1 in same space. In the next ch 1 space, 3dc, ch1, take up one bead, ch 1, 3dc, ch1) repeat around. Sl st on beg. dc. Fasten off. Weave in ends with yarn needle.

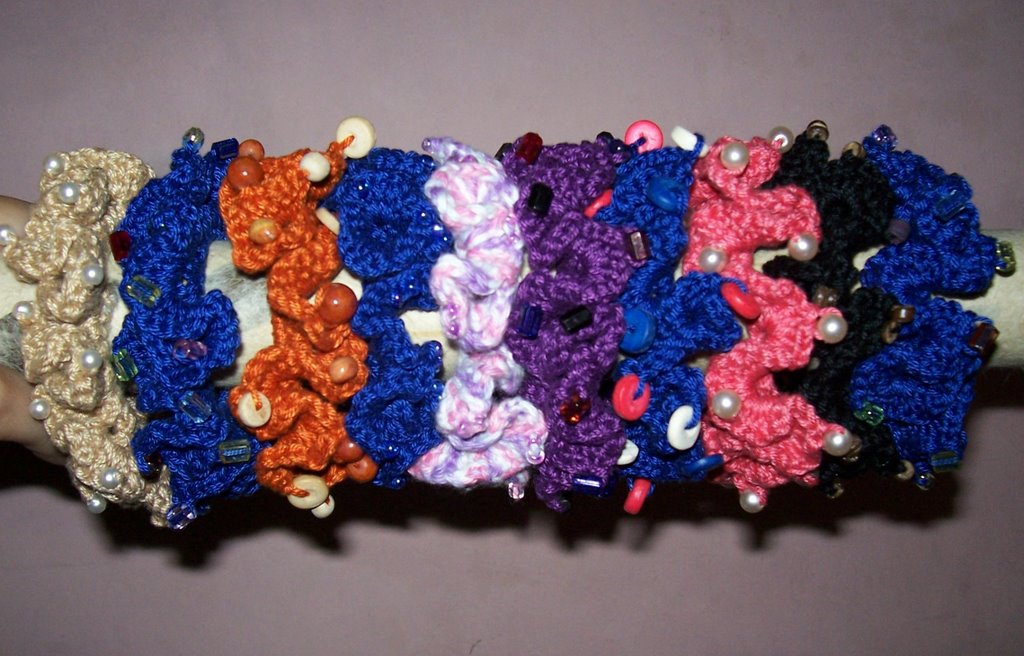
More photos of beaded scrunchies here and here.

Fur scrunchies - photos and tips on making these.

All my designs in one page - thanks to Ravelry!


Appliques for Baby Items
Designed and copyrighted by: Mimi Alelis @2005
http://mycrochetstuff.blogspot.com
Note: Pattern and photos are original, all rights reserved by designer.

Materials: Cotton thread, small amounts
Size 2 or 1.75mm steel hook

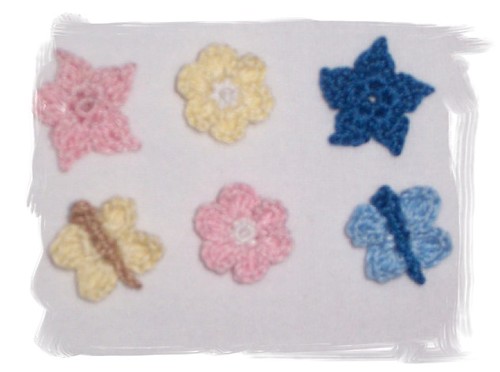
Flower : With white (contrasting color) , ch 2, 6 sc in 2nd ch from hook. Join with sl st to first sc. Change to pink (main color), [ (ch 2, 3dc, ch 2, sl st) in the same sc, sl st to the next sc], 6 times, making 6 petals.

Star : With any color, ch 2, 5 sc in 2nd ch from hook. Join with sl st to first sc.
[ (ch 2, dc, ch 2, sl st in 2nd ch from hook, dc, hdc, ch 1, sl st) in the same sc, sl st to the next sc], 5 times, making 5 points. (Note: this applique is reversible.)

Butterfly : With dk color (for body), ch 8, sl st on 2nd ch from hook, sc in the next 5 ch, 3 sc and sl st on the last ch. Fasten off.
Attach light color (for wings)on the 2nd sc from tail end, [(ch 2, dc, 2 tr, ch 3, sl st) in the same sc], skip 1 sc, sl st on the next sc, repeat [ ].
Ch 2, passing under the body, sl st on the opposite edge of the 2nd wing made, [(ch2, dc, 2 tr, ch 3, sl st) in same stitch], skip 1 stitch, sl st on the next stitch. repeat [ ]. Fasten off.

Balloons : With any color, leaving a 6” tail for sewing, ch 2, 5 sc in 2nd ch from hook. Do not join, work continuously around: 2 sc in next 6 sc, sc in next sc, 2 sc in next sc, sc in the next sc, sc and hdc in the next sc, sl st in next sc. Ch 1, turn, sl st on the next st. Ch 7, or more for the string. Fasten off.
Mitten pattern is here.
All my designs in one page - thanks to Ravelry!

Monday, April 27, 2009

Crochet a Souvenir

For her baby's Christening, my niece requested me to make the souvenirs. (I was just waiting for her to ask - didn't want to assume that they would like my handmade souvenirs...) I wanted to design something new, but I didn't have that much time since I had to make around 40 pcs. so I chose my old design, flower frame souvenir. I made a different edging that looked like rounded petals. I also crocheted the tie instead of using satin ribbon.

Here are the steps in making the souvenir:
1. Crochet the base using green thread

2. Crochet the edging using pink thread (pardon my blurry photos...)

3. Crochet the tie using yellow thread

4. Finish off the ends and weave in the tie around the frame

5. Cut the photo and cardboard to fit the base

6. Insert the cardboard and photo and attach keychain or magnet


I made some into fridgies, since I had some spare magnets. Then the rest I made into keychains...


I didn't realize how making 30+ of these little souvenirs would be so tedious! Also, I had to come up with a neat packaging to add to the creativity and personalized look ;)
Here's the design of the box:


I got the box shape from here. Since I don't know how to design it on the computer, I just cut out the box pattern, and made a layout from the photo and text elements that I printed separately. Then I just scanned/copied it several times (2 boxes per board sheet).

Sunday, April 19, 2009

More on the Romantic Shrug and my latest crochet project


Same picture as this one, different effect ;)
Want to polaroid your pictures too? Its a free download I found here.

My latest shrug design is fast-becoming popular (by my standards)...hehehe...over at Ravelry, 114 have favorited the pattern, 32 have queued it. That isn't a good indication of sales though, but I'm quite satisfied with how its coming along ;)
I would like to thank those who are making the shrug as of now. Bheng, who went over to my house so she could get more tips and buy my extra Tulip hook (the same hook that I used for the shrug); Tin(who is the fastest crocheter of shrugs that I know of...) and Tina, who wants so much to finish the shrug but needs some more photo illustrations. I would very much like to do it now, but...
I still have to make 3x more of these:


Or a total of 40 pcs of souvenirs:


I need to finish it by Friday :p
I'll show here the finished product when its all done ;)

Monday, January 26, 2009

Apple keychain and mini mittens

Time to blog some finished projects, since its nearing the end of January (already!)...
My sister's knitted scarf is almost done, but its taking me so long - seems harder to pick up needles :p But I have finished and mailed to her the crochet slippers she requested:


Other than that I have three little FOs to show you now.

These mini mittens were based from a Japanese design. I haven't written the pattern yet, but will get to it. I'd just have to figure out the thumb part all over again...


While browsing on Ravelry, I found a lot of patterns for booties, some are free. So I picked this pattern and here's what I made:


I will be trying out other patterns and maybe I could make another one for my grandniece. Incidentally, here she is the latest addition to our clan, born on Jan. 12:


The other little item is this apple keychain. I have a pattern for this and it will be posted soon. This will also come out as a free pattern leaflet from Coats Manila Bay :)

Saturday, December 01, 2007

Purse Keychain by Mary Jane Hall

Last week, I wanted to give to my 3 nieces visiting from Australia, a handmade gift that they will like. Just in time, these yarns arrived from my sis in London.


Lustre Fancy Yarn, distributed in UK by Wilkinson,
50% polyester, 50% acrylic.
It has a metallic look, so its hard to photograph. I loved working with it, its smooth and soft. (Though I had a hard time weaving in the ends with a large needle.)


These are the three keychain purses I made, I bought 2 pairs of fancy silver earrings, which I used to embellish the purse. I also bought 3 charm bracelets, to put in each of the purses, it was a nice gift!...but I think they liked the bracelets more :p


Yesterday, I made another one of the purse keychain, since I have one more of the earring to embellish it. I tried to get a good shot, but still...


So, I scanned it...

Tuesday, February 13, 2007

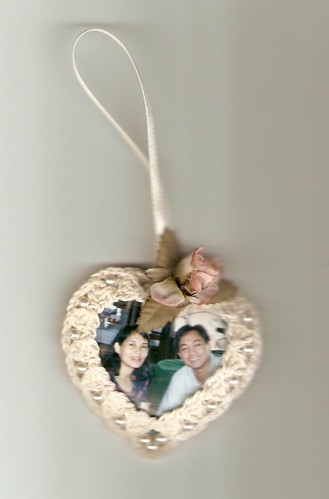
Crochet a Heart Souvenir

Step 1:
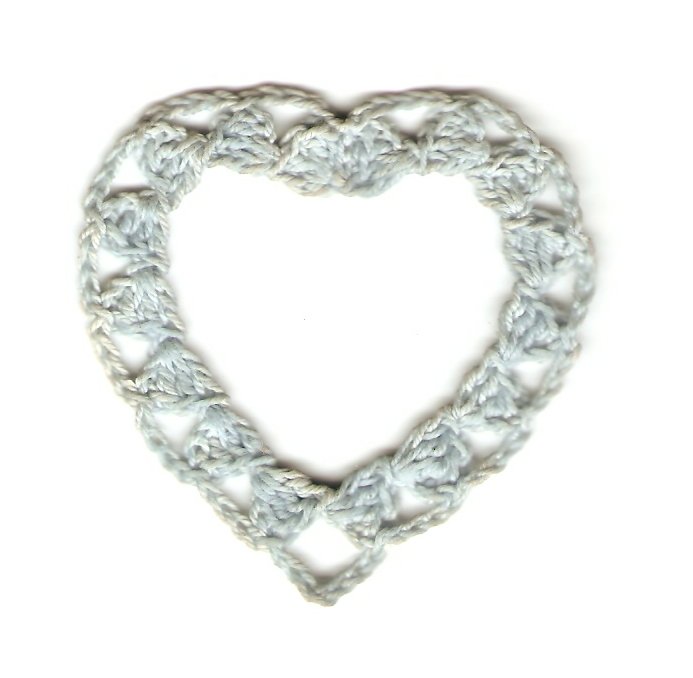
Crochet 2 hearts.
This is not my original pattern, I found it on an old issue of Crochet Fantasy magazine.
There are other heart patterns out there. This one is very pretty, but I havent tried it yet.

Step 2:
With one part water and one part white glue mixture, stiffen the two hearts made.


Step 3:
Choose your picture, make sure it fits the space inside the heart. Trace lightly and add an allowance of 1/8" around. Cut.


Step 4:
Glue a piece of ribbon or hanging loop to one of the hearts, then position the picture in the center and then glue the other heart on top.

Step 5:
Embellish the heart as desired.


Another suggestion:

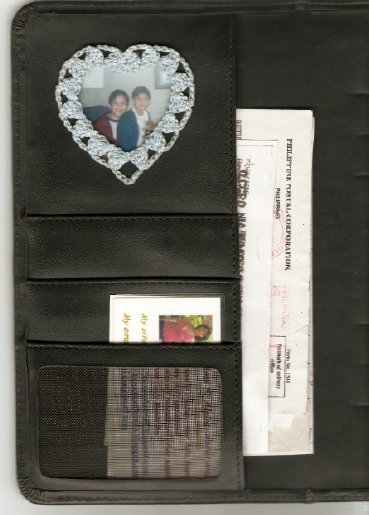
Glue one heart with your chosen photo inside the cover of your notebook: